
Mac users like to boast that once you go Mac, you’ll never go back. When I left the headaches of a Windows machine behind for my iMac I found that to be mostly true. As a Mac user I don’t have to worry about buggy software and the blue screen of death and this makes me more productive.
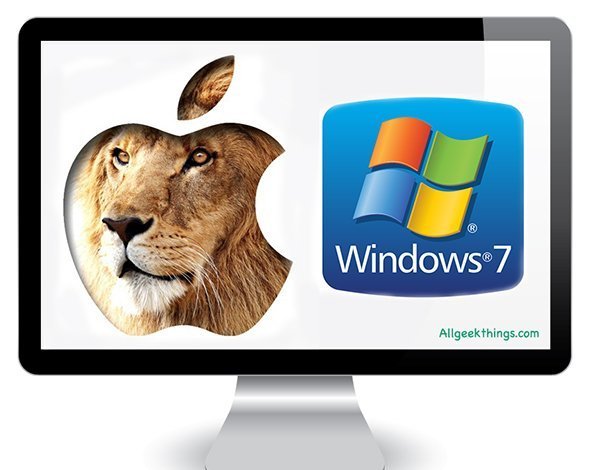
But… (you knew there was a but coming) there are a few things I miss about my Windows PC. They may be considered retro now but I loved to play Empire Earth 2, Pharaoh, Cleopatra, Emperor Rise of the Middle Kingdom and Civilisation III. For a while, I kept a Windows box around just to play these games but then I needed the space, so what to do?
Porting Windows games
There are many articles explaining how to port theses games for Mac using the Wineskin wrapper. I tried this and found that only Emperor Rise of the Middle Kingdom and Pharaoh and Cleopatra worked well. If you own these games already you can download and use your licence keys or you can buy the ported versions. For a while I was content with these results but I still missed those other games. I tried using Crossover but I couldn’t run my Civilisation on it although it’s useful for other Windows applications.
When I got a new iMac with a bigger hard drive I decided to take the plunge and give over some space to Windows. This meant I needed to install a copy of Windows 7 using Boot Camp. I couldn’t install my old copy of Windows XP because Boot Camp doesn’t support it.
Download Windows 7
I didn’t want to pay full price for software that I was only going to use for gaming. So I downloaded a copy of Windows and purchased a licence for less than the price of the DVD copy. If you don’t’ have a copy of Windows 7 you can download an ISO file. The Home Premium version should be enough unless you plan to become a full-blown windows power user. Since the release of Windows 8, Microsoft have removed the direct downloads for 7 from their site but you can still find links to copies on the Microsoft forum. You can download other versions and languages here.
Next you will need to purchase a licence. I purchased my licence from an Amazon seller but you can shop around or get one from IT Revive.
Using Boot Camp to install Windows
Armed with your copy of Windows 7, you will also need your Mac OS X installation DVD or a copy of Boot Camp on a CD.
Before going any further you should back up your hard drive either to an external drive or the cloud.
You can find Boot Camp by searching for it using Spotlight or by going to the > Applications > Utilities folder.
Double click the Boot Camp icon to launch the application. The Boot Camp Assistant will open. Click the Continue button.
You will be asked how much of your hard drive space you want to dedicate to Windows. Depending on what you will be using Windows for 30-40GB should be enough.
After you click partition, Boot Camp Assistant will start preparing your hard drive for Windows. This will take a few minutes and you will need your Windows disk ready.
Once partitioned you will be asked to put your Windows disc in the drive or choose the location where the ISO file can be found. The installation of Windows will start, you will be asked to select a language option and accept the terms.
You will then be asked what kind of Windows installation you want. Choose custom install. You will get a list of hard drives to install Windows on. Make sure you choose the Boot Camp partition and click format. This will format it to Windows’ native NTFS file system. Once partitioned the installation of Windows will begin proper. It’s a good opportunity to pop out and smoke a cigarette or grab a cup of tea.
The computer may restart a few times during installation. When done you will be asked for your licence key, enter the key and click next. Other set up screens include date and time zone setup and network setup, just follow the on screen instructions.
When Windows finally loads, insert your Mac OS X or Boot Camp disk into your DVD drive and install the Apple software updates and drivers onto the system. You will need these for Windows to run properly on your Mac.
For further assistance see Apple’s FAQs.
Install anti-virus software
Once you have your copy of Windows up and running don’t forget to install anti-virus software. The free version of AVG should be enough for casual use.
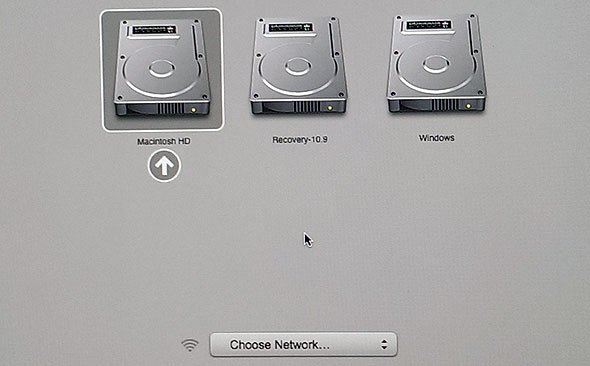
Dual booting
Boot Camp version of Windows comes with an option allowing you to boot back into your Mac it sits in the windows system tray. Unfortunately the Mac doesn’t have this as standard. I use BootChamp to dual boot into Windows from my Mac. It is so much easier than the alternative.
In order to boot into Windows manually you will have to hold down the option (alt) key for a few seconds when your computer is restarting. This will bring up the boot manager and you can choose which system you want to use. This can get annoying if you aren’t quick enough to hold the key down whilst the screen is grey.
Deleting a Boot Camp partition
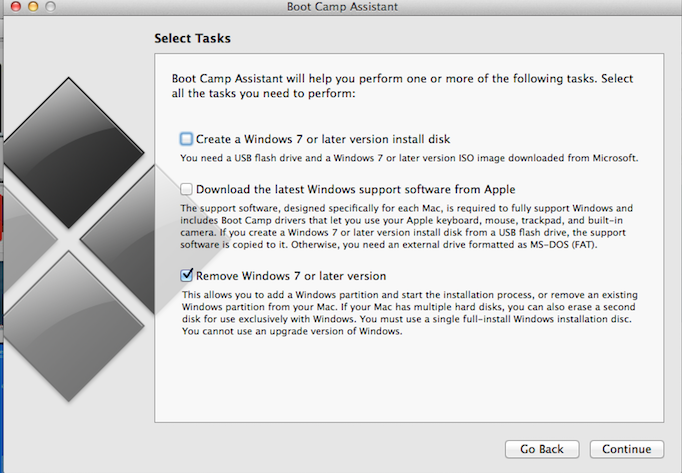
If you decide that retro gaming isn’t as fun as you remembered or want to reclaim the space given over to Windows, you can remove the partition by firing up Boot Camp Assistant and deleting the partition. Remember to back up everything you need from your Windows partition first.
Happy gaming!
Leave a Reply